Understanding CPU Compatibility with Motherboards
Upgrading your CPU requires ensuring it is compatible with your existing motherboard. Motherboard and CPU must match to work together. Upgrades can fail without proper compatibility checks.Learn about how to upgrade CPU with this comprehensive guide.
Types of CPU Sockets and How to Identify Yours
Different motherboards have specific CPU sockets. A socket connects the CPU to the motherboard. Common types include LGA, PGA, and BGA. These sockets do not work with all CPUs. Use your motherboard’s manual or a tool like CPU-Z to identify your socket type.
Checking Compatibility Online With Tools Like CPU-Upgrade
Use online tools like CPU-Upgrade to check CPU compatibility. These resources help match your motherboard with suitable CPUs. Input your motherboard details to find a compatible processor. Sites list compatible Intel and AMD CPUs, but may not have all models. Always double-check before buying a new CPU.
Picking the Right CPU for Your Needs
Selecting the right CPU involves reviewing different model specifications. This ensures you get the best performance for your budget.
Comparing CPU Specs: Core Count, Clock Speed, and More
When picking a CPU, major specs like core count and clock speed are important. Core count indicates how many tasks a CPU can handle at once. Clock speed measures how fast a CPU can process those tasks. Together, they determine multitasking ability and speed.
Look at the cache size, which affects data retrieval speeds. TDP, or Thermal Design Power, shows how much heat your CPU emits under full load. Integrated graphics decide if you need a separate GPU. Balance these features with your tasks and workload demands.
Reading Reviews and Benchmarks
Reviews give insight into real-world CPU performance. They point out strengths and weaknesses not obvious in specs alone. Benchmarks compare different CPUs in standardized tests. They help visualize performance differences. Look for recent reviews and benchmarks for the latest info.
Reading expert feedback helps predict how a CPU performs in your setup. User reviews add value by showing everyday experiences. Make informed choices by considering both expert and user insights.
Preparing for CPU Installation
Before you embark on the CPU upgrade journey, preparation is paramount. It helps prevent data loss and compatibility issues.
Backup Your Data and Update BIOS
To minimize risks, back up your data. Use an external hard drive or a cloud service.
Updating BIOS can ensure compatibility with your new CPU. Check your motherboard’s website for the latest firmware.
Tools Required for CPU Installation
For a smooth installation, gather the necessary tools:
- A screwdriver for opening the case and securing components.
- An anti-static wrist strap to avoid damaging parts with static electricity.
- Thermal paste essential for proper heat conduction from CPU to heatsink.
- Rubbing alcohol and a soft cloth for cleaning old thermal paste.
With your data safe and the right tools in hand, you’re set for the actual hardware upgrade.
Removing the Old CPU
To upgrade your CPU, start by safely removing the old one. Turn off and unplug your PC, and ground yourself to prevent static damage.
Safely Uninstalling Heatsink and Cooling Solutions
Carefully disconnect the CPU fan and unscrew the heatsink from the motherboard. If you have a liquid cooler, unlink the waterblock instead. Handle with care to avoid damaging other components.
Cleaning Off Old Thermal Paste Accurately
Use rubbing alcohol and a soft cloth to wipe away old thermal paste from both the heatsink and the CPU surface. Be thorough but gentle to maintain the integrity of the components.
Installing Your New Processor
Once you’ve removed the old CPU and cleaned up, it’s time to install the new one.
Aligning and Placing the CPU Correctly
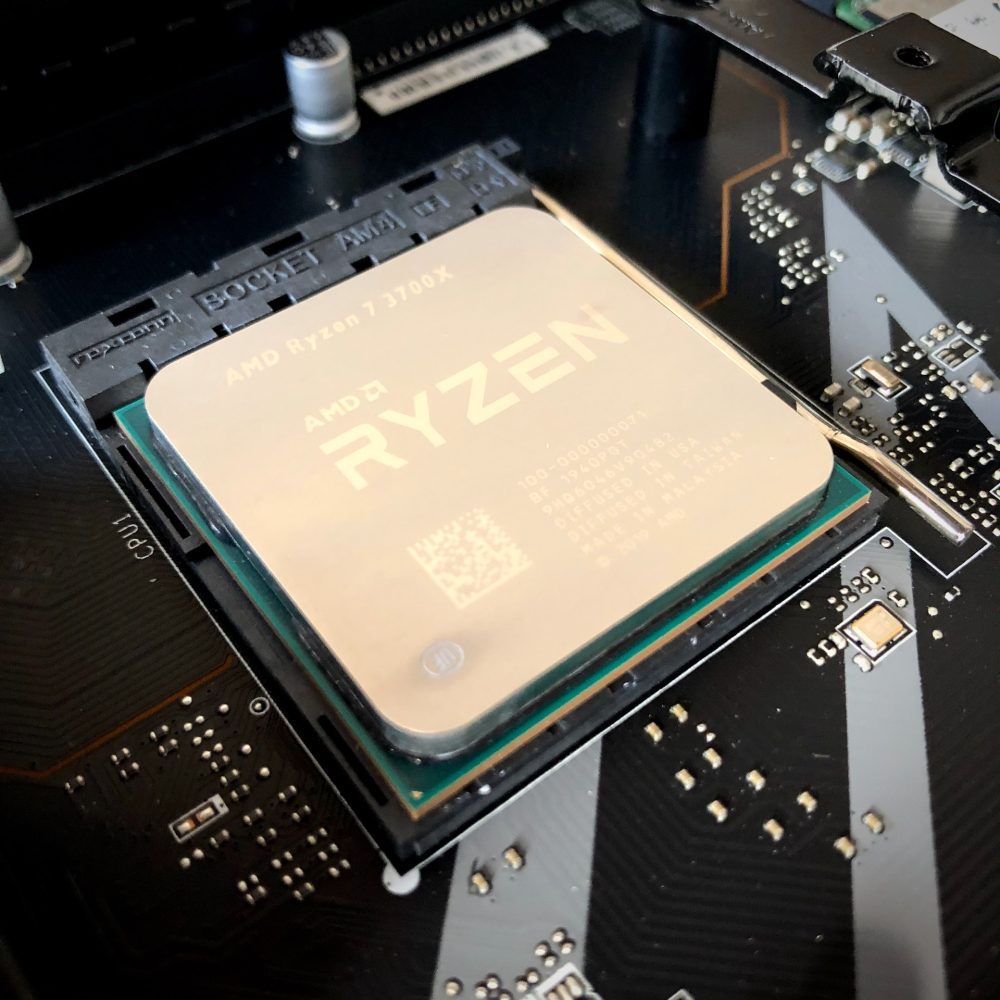
Before you place the new CPU into the socket, check for the triangle marker. Align this marker with the one on the socket. Then, gently set the CPU into place. Don’t push or force it; it should fit snugly without pressure.
Securing the CPU in the Motherboard Socket
After setting the CPU correctly, lower the retention arm or lever. This locks the CPU securely. Make sure the lever fits under its retention tab. This step ensures your CPU connects well with the motherboard.
Applying Thermal Paste and Reinstalling Cooling Mechanism
After securing the new CPU, applying thermal paste is critical. It ensures heat transfers efficiently from the CPU to the heatsink or cooling system.
Best Practices for Thermal Paste Application
Apply a pea-sized amount of thermal paste to the center of the CPU. Avoid spreading it – the pressure from the heatsink will do this evenly. Use quality thermal paste for best results. Too much paste can hinder heat transfer, while too little may cause overheating.
Attaching Heatsink or Liquid Cooling Systems Properly
For heatsink installation, place it over the CPU aligning with the mounting holes. Tighten screws diagonally to apply even pressure. Connect the fan power cable to the motherboard. For liquid coolers, align the water block onto the CPU. Secure it with the designated mechanism and attach any required cables.
Make sure the cooler does not wobble and has good contact with the CPU. Poor installation can lead to heat issues and reduce CPU lifespan. After completing these steps, you are ready to close up your PC and test the new upgrade.
Final Steps and Testing
Ensuring Everything Is Reconnected
Before closing the computer case, double-check all connections. Ensure the CPU fan’s power cable is firmly plugged into the motherboard. Inspect all other cables and power connections. They should be secure and in their appropriate places.
Once connections are verified, you can close the case. Replace any screws or panels you initially removed. Make sure the case is sealed to prevent dust from entering.
Booting to BIOS and Verifying New CPU Functionality
Connect your monitor, keyboard, and mouse. Then, switch on your PC. Watch for the startup screen. Press the key for BIOS – often ‘Delete’, ‘F2’, or ‘F10’.
In BIOS, check that the system recognizes the new CPU. You should see the new CPU’s name and specifications. Look for the CPU temperature to confirm proper cooling function.
If your PC does not start or the BIOS does not recognize the new CPU, power off and recheck your installation.
After BIOS verification, save any changes, if needed, and let your system boot. Your computer should now start with the upgraded CPU functioning. Run some tasks or programs to confirm the performance benefits.


